
I’m Pete Marin, the founder of Airbrush Events, and I’ve been practicing the art of airbrushing for over 30 years. Building the perfect airbrush studio setup can transform your creative process, giving you a space that’s both functional and inspiring. This guide covers everything you need to know—from selecting the right space to lighting, ventilation, and storage solutions—to help you create a productive and comfortable studio.
Choosing the Right Space for Your Airbrush Studio Setup
The foundation of a great airbrush studio starts with the right location. Whether it’s a spare room, detached shed, or garage, the space should be comfortable and conducive to creativity. If your chosen area lacks heating or air conditioning, prioritize these upgrades. A comfortable environment isn’t just a luxury—it’s essential for your artistic flow.
Lighting: The Heart of Your Studio
Proper lighting is crucial for any airbrush studio setup. I recommend fluorescent lighting with a mix of daylight and warm tones to ensure accurate color representation. Additionally, painting your walls and ceiling white helps improve light distribution, reducing the need for excessive artificial lighting and saving energy in the process.
Preparing for Creativity—and Messes
An airbrush studio is a creative lab, and messes are part of the process. To prepare for spills and splatters, choose easy-to-clean flooring like sealed concrete or use removable rugs. This practical approach keeps your studio tidy while allowing you to focus on your work without worrying about accidental messes.
Organizing Your Space: Storage Solutions for Your Airbrush Studio Setup
Efficient storage is vital for a functional studio. Install cupboards, shelves, and a shop sink for easy cleanup. For artists working with multiple airbrushes and paint colors, a bottle rack is indispensable. You can create your own by drilling holes into a wooden plank to hold your paint bottles securely. This DIY solution is simple, cost-effective, and an essential tool for keeping your workspace organized.
Safe Disposal Practices for Solvent-Based Paints
Proper disposal of solvent-based paints is critical for safety and environmental responsibility. Use a solvent-resistant container and a funnel to store excess paint, then take it to your local hazardous waste facility. If you work with water-based paints, these are generally safe to wash down the drain, but it’s always wise to check local regulations to ensure compliance.
Easel and Ventilation: Custom Solutions for Comfort and Safety
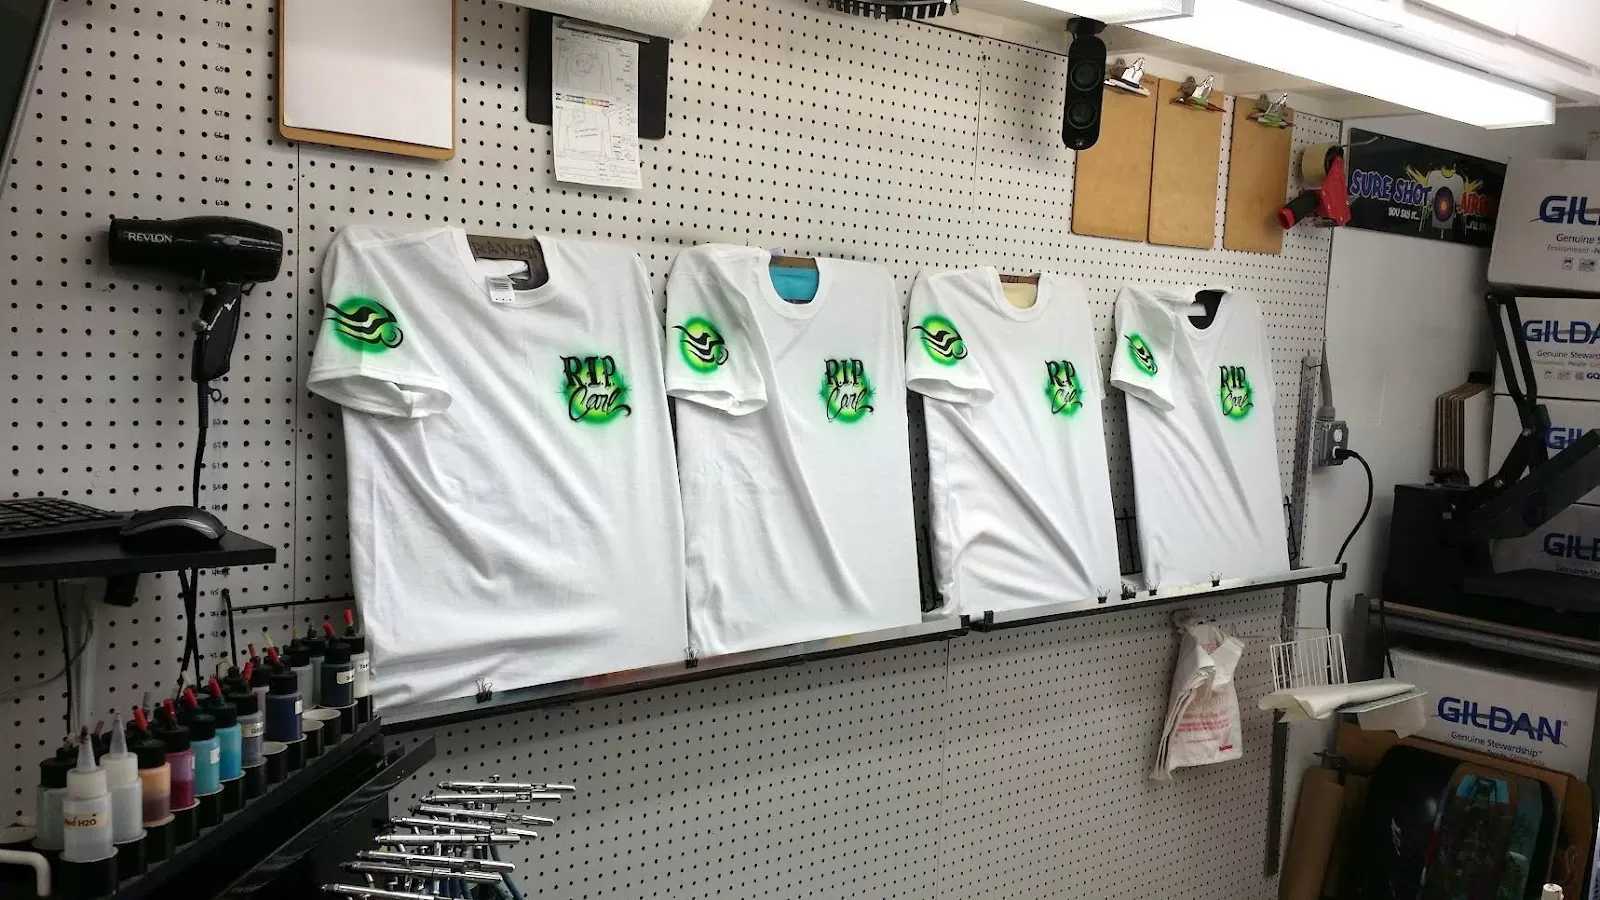
The easel is another vital component of your airbrush setup, and while there’s the option to purchase one, a functional and space-saving alternative is to build it directly onto your wall. This do-it-yourself approach saves floor space and allows for a high degree of customization.
Here’s a simple and efficient method: start with a piece of pegboard affixed to your wall. The versatility of pegboard lies in its adaptability—purchase the appropriate hooks designed for shelving, and voilà, you have an adjustable support for your work.
This makeshift easel allows you to slide shelves up or down to accommodate various canvas or t-shirt sizes, ensuring your project is always at the most comfortable height for you to work on. This solution is not just about convenience; it’s about customizing your creative space to fit your unique needs and workflow.
Settng up Ventilation
Ventilation is an essential aspect of setting up an airbrushing space, often as critical as proper lighting and maintaining a controlled climate. Ideally, you want a fan situated near your easel to whisk away the overspray from your work area, directing it away from your face for safety.
If venting to the outdoors isn’t feasible, don’t worry. You can improvise by placing a standard home HVAC filter in front of a fan—essentially creating a makeshift air purifier. These filters are conveniently sized to match a typical 20-inch box fan, which you can pick up inexpensively, say for around $25. Position the fan close by, so it draws the overspray through the filter. I’ve found this setup quite effective in capturing excess paint particles.
For those looking to minimize the equipment’s intrusion into the workspace, consider mounting the fan above, ensuring it remains near enough to the easel to be effective. There are numerous ways to engineer a ventilation system, but this method is a cost-effective and straightforward solution that promises quick results.

The Air Compressor: Powering Your Creativity
Selecting an ideal air compressor is a pivotal decision in the art of airbrushing. I prefer the Senco PN1010 for its reliability, especially for smaller projects like t-shirts and hats. Check out my full review of the Senco PN1010 here.
However, if your artistic endeavors extend to larger canvases, consider a beefier 10-gallon compressor with a robust one or two horsepower motor. Such a unit won’t just excel at airbrushing; it’s versatile enough to tackle extensive projects that require a heavier hand, like using automotive spray guns.
Silent compressors might seem like an attractive, noise-reducing option, but they come with a hefty price tag ranging from $700 to $1,000, and their durability can be a concern. These compressors contain oil, necessitating periodic changes, and they can emit an unpleasant odor when heated.
For those who prioritize a quiet studio, I suggest investing in a larger compressor and isolating it in a separate room, ideally cushioned by fiberglass insulation to muffle the sound. Remember, proper ventilation is critical to prevent overheating. With careful placement and insulation, you can significantly reduce noise without compromising the compressor’s efficiency.
Enhancing Your Airbrush Studio Setup
- Music can create a motivating atmosphere, so don’t hesitate to set it up in your studio.
- Document your artistic journey and promote your work online by setting up a recording device and tripod.
- For easy reference and tutorial access, invest in a wall-mounted computer screen near your easel.
- Explore additional tools like opaque projectors and stencil cutters to unlock diverse artistic possibilities.
Conclusion: Your Studio, Your Sanctuary
Setting up the ultimate airbrush studio has been a journey where practicality meets creativity. Through my own experiences, I aim to equip fellow artists with the knowledge to create a space that meets their technical needs and inspires their best work. Remember, your studio is more than just a workspace; it’s a reflection of your artistic identity – a sanctuary where creativity knows no bounds.
By following the advice I’ve gathered over the years, you can craft a studio that streamlines your workflow and elevates your creative experience. It’s all about designing a space where art, efficiency, and personal well-being coexist in harmony, propelling your creativity to new heights.
Frequently Asked Questions: Airbrush Studio Setup
Which air compressor is best for t-shirt airbrushing?
For smaller projects like custom t-shirts and hats, the Senco PC1010 is the industry favorite. It is highly reliable, portable, and provides consistent pressure for detail work without the massive footprint of industrial compressors.
How do I build a DIY space-saving airbrush easel?
A great DIY solution is to affix a piece of pegboard directly to your studio wall. By using adjustable shelving hooks, you can create a customizable support system that slides up or down. This allows you to fit various canvas or t-shirt sizes while keeping your floor space completely clear.
How should I handle airbrush paint disposal?
Safety is a priority. Solvent-based paints should never go down the drain; store excess waste in a solvent-resistant container and take it to a local hazardous waste facility. Water-based paints are generally safer for drains, but always verify your local environmental codes first.
What is the best flooring for an airbrush studio?
Since spills and splatters are inevitable in a creative lab, sealed concrete is the ideal choice for easy cleanup. If your space is already carpeted or finished, use removable rugs or heavy-duty floor mats that can be easily cleaned or replaced.
How can I reduce compressor noise without buying an expensive “silent” model?
You can muffle a standard larger compressor by isolating it in a separate room or closet and surrounding it with fiberglass insulation. Just ensure the area is properly ventilated to prevent the motor from overheating during long painting sessions.
What is the best way to organize airbrush paint bottles?
For an easy and cheap organization tool, drill holes into a wooden plank or 2×4 to create a custom bottle rack. This keeps your bottles upright, prevents spills, and ensures your most-used colors are always visible and within reach.